A Milling Participant
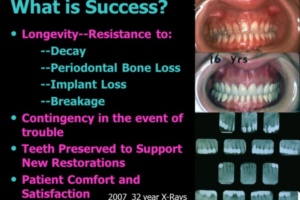
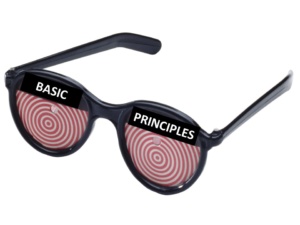 I always emphasize in any course how important it is to evaluate new technology through the lens of basic principles. The basic principles that I teach have an unmatchable track record that has allowed my father and I to have tremendous success with full coverage restorative dentistry. The basic principles are documented with more than 100,000 pictures of cases created during the past 70 years and many of these cases were followed for decades WITH follow-up X-Rays.
Looking at Dentistry through the lens of basic principles does not mean that I automatically pooh-pooh new technology. On the contrary, I want to do better—I want to move forward! I am VERY interested and want to see what is being done “out there.”
However, I strongly believe that any new technology must be compared to the standard that came before. How do outcomes of the old method and the new method compare? Much of the technology in full coverage restorative dentistry does NOT compare to the standard that came before. I do not care how popular it is—most individuals are evaluating technology through the lens of economics and productivity and that is NOT science!
However, some of the technology not only does compare to the standard that came before, it is clearly superior. This is exciting! Such technology is likely to weather the test of time and replace its forbears. I was introduced to such new technology this year. A series of events occurred that made me re-think about my standard approach to crown and bridge fabrication.
I was in the middle of making bridgework for a patient. I had taken my impressions and submitted my models to an excellent laboratory here in Arizona. During the course of my career and my father’s career, all the dentistry was fabricated with the lost wax technique. The technique for centrifugal casting was invented in 1907 by William Taggert and perfected in 1929 with Coleman and Weinstein’s invention of cristobalite investment. The lost-wax casting technique became the industry standard for over a century. I used this technique for my entire career spanning 45 years. And then…
The laboratory called one day to inform me that their casting machine broke, and they were not going to repair it. They asked me to pick up my case and they offered me the names of several labs in the area who they thought might be able to do my work. But, alas, these labs were not willing to wax-up and cast either. It became clear that conventional waxing and casting was on its way out.
No, I did not panic and have a nervous breakdown. (I did scream, and it made me feel better.) Fortunately, I was already in the process of investigating scanning and milling. I had been in touch with Strategy Milling, a company in Pennsylvania that is at the forefront of milling precious metals. They have been working on fabricating male/female precision attachments through milling, as the attachments were no longer being cast by the Sterngold (or any other) company. [The Sterngold company patented the #7 and Latch Male/Female Attachments in 1921 and carried them for 100 years before dropping them]. I already knew that Strategy Milling (www.strategymilling.com) was milling precious metals for full and partial coverage restorative dentistry. Scott at Strategy Milling recommended a lab in Houston to do the scanning and CAD/CAM design of restorations (Esthetics Dental Studio: https://www.estheticsdentalstudio.com/). This lab designs the restorations, messages a video of the design for verification and emails the CAD/CAM files to Strategy Milling for direct milling of the restorations.
When my case returned from the labs, the restorations had been milled in one piece. Normally, castings are cast individually and then connected intraorally and then soldered. Because the castings are individually waxed and cast, models are typically made with removable dies. Unfortunately, for this case I had to split the restoration into individual components and connect them intraorally. Models with dies that are removable are not accurate enough to make a one-piece casting.
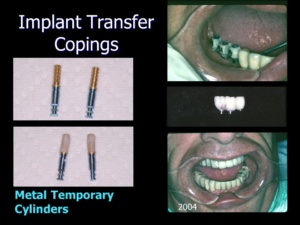
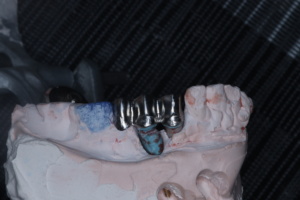 However, seeing how nice the one-piece casting looked got me thinking. It occurred to me that creating models with non-removable dies should be accurate enough to make one-piece castings. A light went off in my brain. This is exactly how I have been making implant restorations for the past 20 years! I use the metal temporary cylinders as transfer copings to create temporary restorations that train the gingiva for ideal emergence profile. The temporaries serve as a blueprint for the finished restorations. All of the information encoded in the temporary restorations is transferred to the master models with this simple technique.
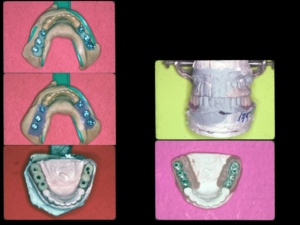
To create my master impression, I simply take an impression of the temporary restoration(s) seated in the mouth. The temporary restoration is removed from the mouth and the implant analogs are screwed into it. The temporary is then inserted into the impression. This impression is poured and mounted with quick-setting plaster and stone while the patient waits in the chair. The models have always been accurate enough to fabricate final restorations that seat perfectly. It is rare that implant bridges have to be sectioned and reconnected intraorally because of poor fit.
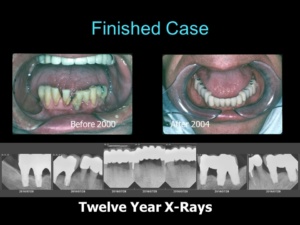
So it occurred to me: Why not use the same implant technique for crown and bridgework on natural teeth?
I have always done my own laboratory preparatory work—dies and models—because the restorations are going to be made on these models and I want to ensure that they are correct. A lot of practitioners feel that laboratory work is beneath them, but truthfully—I don’t see how you can be a great practitioner without doing some laboratory work. I make my own dies and ditch them where the margins are to be. I make sure that the models are correct and that I like the preparations before I send the case to a technician. I do not want any guesswork from the technician and I want to make it as easy as possible for the technician to deliver top quality work.
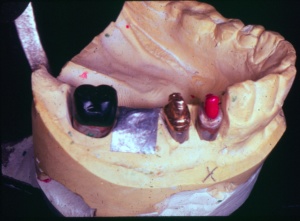
In addition to making the dies and models, I have also—for many years–made special acrylic transfer copings on the dies in order to make accurate models. The technique for making these transfer copings derives straight from the roots of Dentistry. Before the advent of plastic-like dipping waxes in the 1980s, the only way to make accurate castings that did not have gaps at the margins was to swage (tightly adapt) gold or palladium foil onto the die and wax-up the restoration directly on the foil. The foil ultimately became part of the restoration during the casting process, ensuring great fit.
To make the acrylic transfer copings I use the inexpensive .001” thick tin foil instead of the expensive gold or palladium foil. I tightly adapt the foil to the die using the same inexpensive swaging device that is available from any dental laboratory supply company. On the tightly-adapted foil I carefully paint brush acrylic and quickly pass each brush load through a flame to prevent the acrylic from running into the ditched margins of the die. The acrylic sets quickly, resulting in a thin, tightly-fitting acrylic transfer coping that fits like a casting.
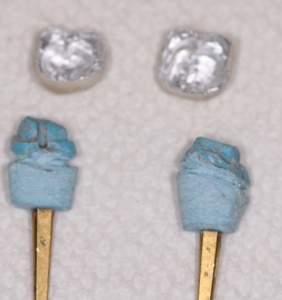
At the patient’s appointment, I place each transfer coping on its respective preparation in the mouth and connect them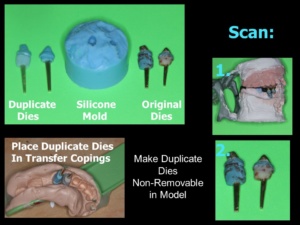 together with acrylic. Adding an acrylic bite to the connected copings allows the models to be easily mounted. I then pour and mount models with non-removable dies in the same exact manner that I pour and mount implant impressions with non-removable analogs.
I realized that desktop scanning of models with nonremovable dies can sometimes present problems and that it would be advantageous for the lab to have individual duplicate dies in addition to the model. It is quite easy to make duplicate dies and the process does not take up very much of my time. In fact, I make all of my dies and transfer copings at home!
So—I know you are wondering—what is the point of this saga? In a nutshell:
New technology should simplify the process of crown and bridgework without sacrificing basic principles of health and longevity. Use out of the box thinking to incorporate new technology when it is clearly superior to conventional techniques and adheres to tried-and-true basic principles.
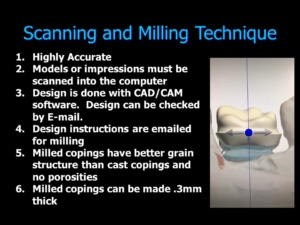 I advocate all the time how important it is not to skip steps yet this new technology of scanning and milling makes it possible to skip a step without violating basic principles!
It is important to recognize that not all scanning technology is appropriate for fabricating ideal crown and bridgework. Intraoral scanning has limitations because it cannot scan tooth structure below the gingiva. CBCT scanning cannot register accurate impressions of the interproximal aspects of natural teeth. For this reason, it cannot replace copper band impressions, which are the only available way to register impressions of the entire root structure below the gingiva (without completely cutting away the gingiva). Scanning impressions presents challenges for desktop scanners. At the moment scanning models with non-removable dies appears to be very accurate, especially when duplicate individual dies are also offered up for scanning.
And lastly: what you have all been waiting for—what is the moral of this saga?
“When life gives you lemons, make lemonade”—as my closest friend emphasizes to me almost daily.
Did you notice the picture of my scream at the beginning of this blog? It seemed like such a terrible tragedy when it became almost impossible to find laboratories willing to do conventional waxing and casting. However, this tragedy turned out to be a blessing in disguise. So often life throws a curveball that throw us off guard. Just when we think we are going to strike out, the curveball becomes a blessing that enables us to hit it out of the park.
Become the best practitioner in full coverage restorative dentistry that you can be! Don’t settle! Join the ONWARD program and learn how to do crown and bridgework with excellence and confidence, how to save “hopeless” teeth, and how to provide new options for patient treatment that you never thought of. Visit the website and join here: https://theonwardprogram.com/membership/
Dr. Feinberg is also available to give presentations. His CV and speaker packet is posted on the website. (https://theonwardprogram.com/about-dr-feinberg/) Dr. Feinberg can be reached at info@theONWARDprogram.com.

